

Nicholas Schulte
Technology Specialist
Embed an Interactive Map on your Webpage
ArcGIS Online allows users to easily add an interactive GIS map to a webpage. The user selects a map that they have created along with desired display features. ArcGIS Online then generates code that can be pasted into an HTML file so that the map is displayed on a webpage.
ArcGIS Online lets developers easily embed Maps in a webpage
Initial Considerations
To build an ArcGIS Map that can be embedded in a website, you will need an Esri developer account. Many academic institutions support site licenses for GIS products from Esri, the maker of ArcMap, ArcGIS Pro, and ArcGIS Online, so you should check whether an authorized developer account is available to you through your institution. If this is not an option, free developer accounts are available, although these are limited in their functionality.
In addition, as of this writing (August 2021) ArcGIS Online has transitioned to a new Map Viewer from what is now called the Classic Map Viewer. Originally, the option to embed a Map in a website was only available in the Classic Viewer; currently, either Viewer can be used. But note: using the Classic Map Viewer currently allows you to publish and embed a Map that does not require any special access by your viewers (although this may well change in the future). Using the new Map Viewer requires that viewers have their own ArcGIS Online accounts, or that the developer account is authorized to create public maps.
A button to switch between the new and the classic Map Viewers is located on the top navigational bar of the ArcGIS Online Map Viewer page. However, the New Viewer is not fully backward-compatible with the Classic Viewer, so if you are using a free developer account it is better to build the map to be embedded using the Classic Viewer. (Display issues can occur when building the map in the New Viewer, switching to the Classic Viewer, and then using the embed option.)
Layers and styling saved in the Map Viewer will be displayed in the embedded Map
Designing a Map in ArcGIS Online
There are three basic steps to designing a Web map in ArcGIS Online: creating a new map, adding content, and sharing the map. (A full treatment of the features of ArcGIS Online is beyond the scope of this article, but this will help you get started.)
i) Creating a New Map
Once you are logged in to your ArcGIS Online Developer’s account, from your Dashboard find your way to Features, Content Management, Create a Web App. Follow the Steps to Create a Web map.
Create a Web Map
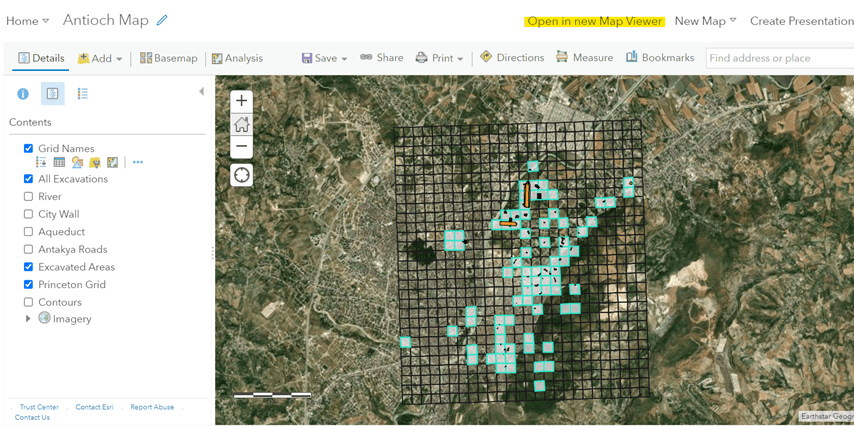
Alternatively, navigate directly to the Map Viewer tool and Sign in with your developer account. Notice the toggle to choose either the new Map Viewer (by default) or Map Viewer Classic.
Getting started with Map Viewer
ArcGIS provides a number of standard base maps styles to use as the backdrop for your map. The Basemap is selected from within the Map Viewer. Select the Imagery basemap, for example. Save the Map to add it to your ArcGIS Online Content.
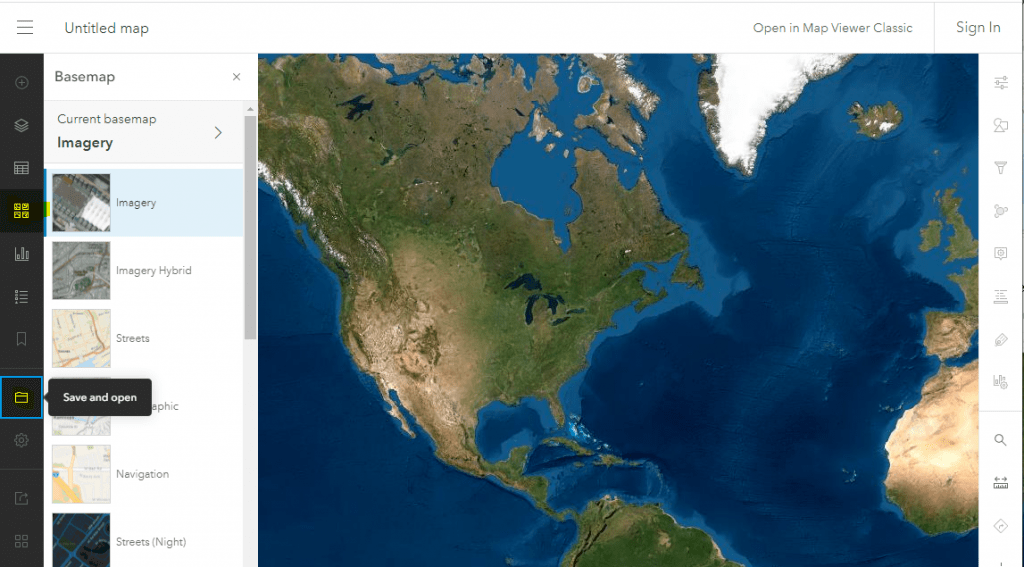
Select the basemap and Save the map (new Map Viewer)
Alternatively, here the Streets basemap is selected using the Classic Map Viewer:
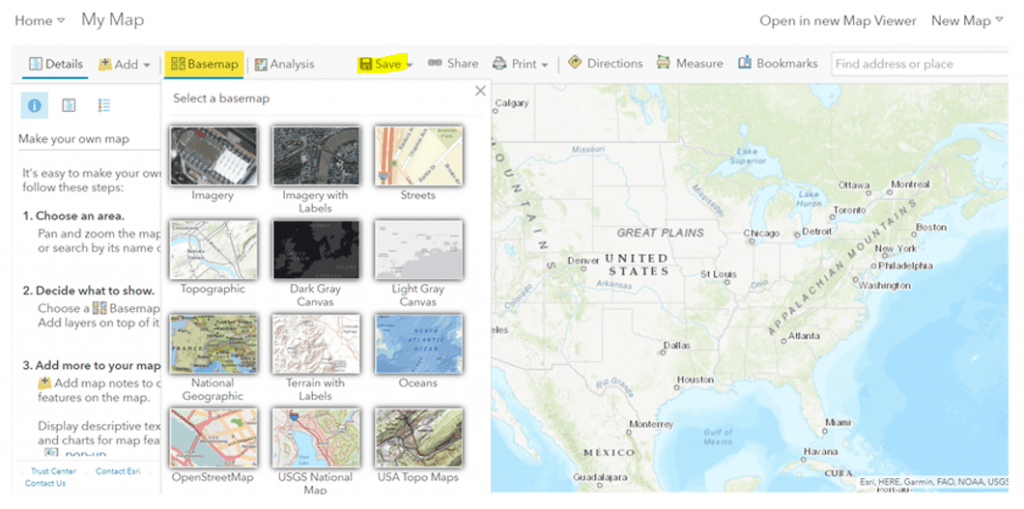
Select the basemap and Save the map (Classic Map Viewer)
ii) Adding Content
Shapefiles, georeferenced raster images, labels, and map notes can be added and styled in the Map Viewer. These are cataloged and organized on your account’s Content page. Find your content by clicking the menu button (3 horizontal lines) at the top-left of the new Viewer, or by clicking the Home button in the Classic Viewer.
Adding Content: a Shapefile
From the Content tab of your developer account, choose to Add a New Item:
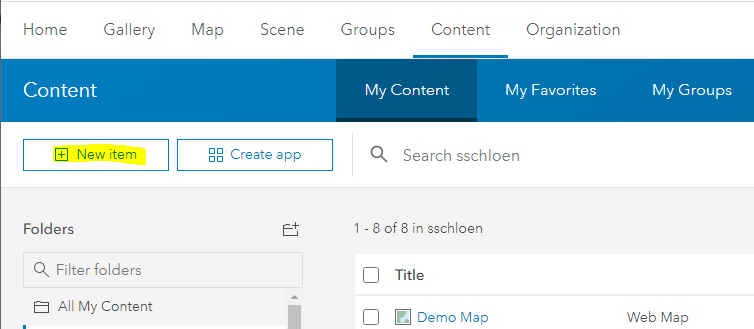
ArcGIS Content: Add New Item
To add a shapefile created in ArcMap or ArcGIS Pro, or exported from OCHRE, drag-drop a .zip file that contains a shapefile and all of its sidecar files onto the upload panel. This will create a Feature Layer based on the shapes, and the corresponding attribute table, in the shapefile.
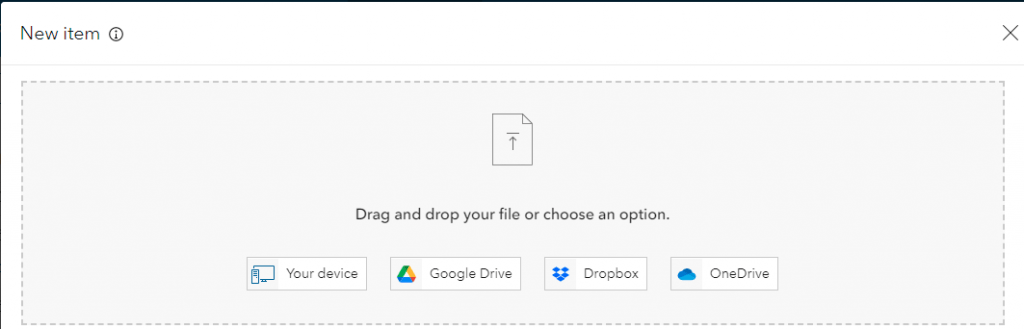
Add content from a zipped shapefile
From the Map Viewer you can now Add Layer, and search for the Feature Layer created by the shapefile. Add this layer to the Map. Use the Style options to control the shapes’ color, transparency, and visibility range.
Add Feature Layer to Map, and Style it
Alternatively, from the Classic viewer select the Add option on the top navigational bar and choose Add Layer from File. Select the desired, zipped shapefile when you are prompted and click Import Layer. The shapefile is then automatically added to the map’s Contents pane on the left side.
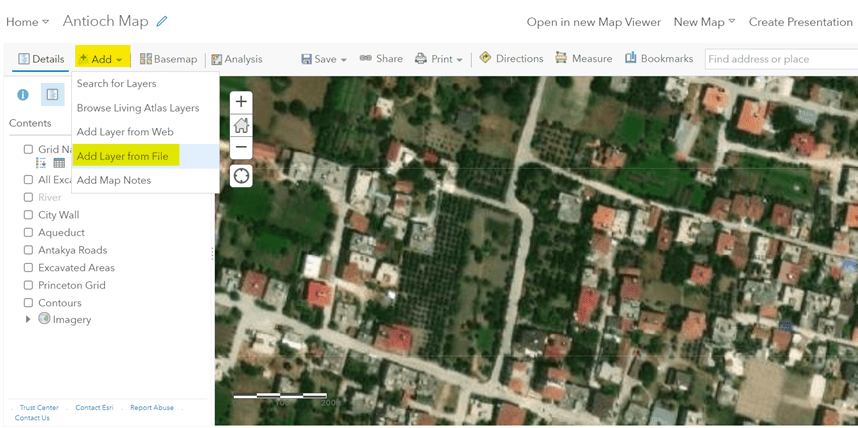
Add layer from file (Classic Map Viewer)
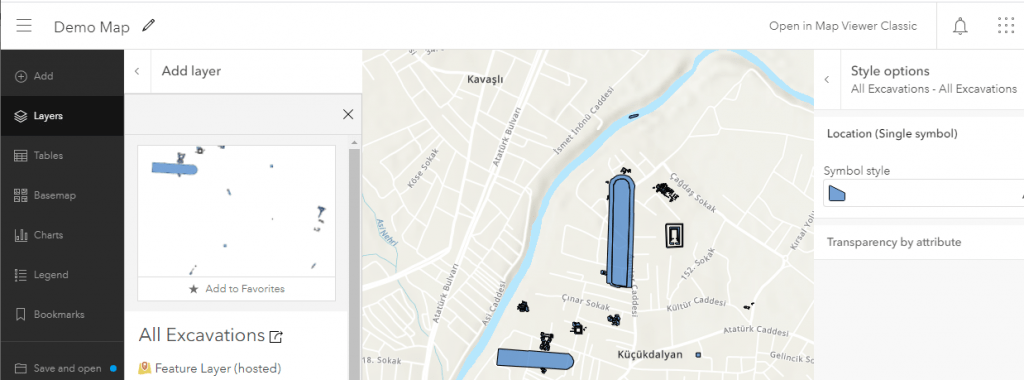
The Style option, the icon for which is listed under the shapefile entry, allows you to edit a shape’s color, transparency, and visibility range. Styles can be applied uniformly to every shape or in groups based on attributes.

Style options for shapes (Classic Map Viewer)
Tip: for a basic overview map of a large archaeological project area I find it helpful to create a layer that displays only the excavated areas (e.g. grid-squares). This can be accomplished by adding a layer that contains the area’s full grid system. A user can then filter for excavated squares and uniquely style them.

Use filters and styles for creative effects
Adding Content: a Raster Image
To add a georeferenced raster image to your Web map, login to your ArcGIS Online developer’s account using ArcGIS Pro (the Sign in option is at the top right of the main menu bar). Open a new map Project and add the desired raster to the map; e.g. drag-drop it from the Arc Catalog. The raster image will be added to the list in the Contents pane on the left; select it there.
Click on the Share tab on the main menu bar. Select the Web Layer option, then choose to Publish as Web Layer. The Share as Web Layer configuration pane will become available (in the right-hand pane).
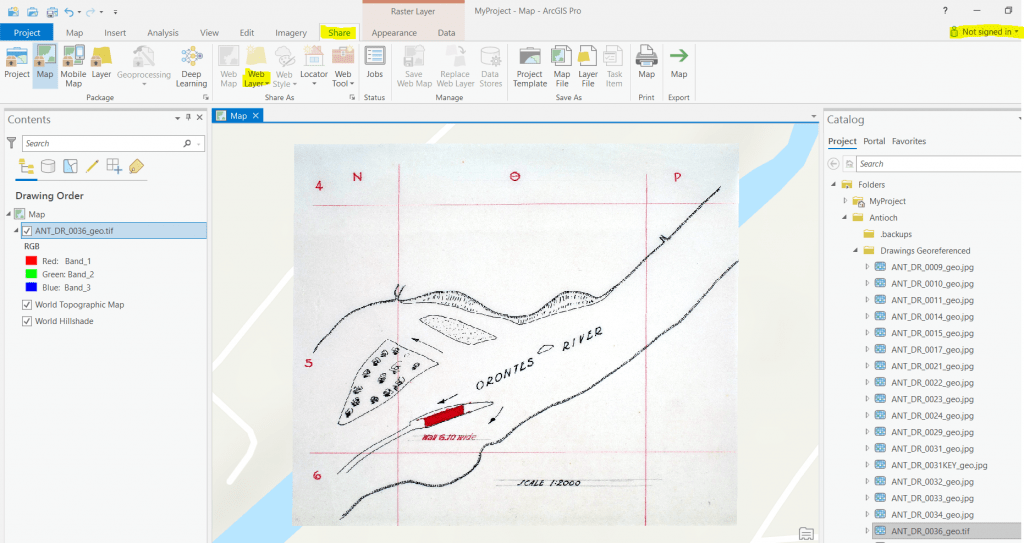
Working with georeferenced raster images in ArcGIS Pro
The Share as Web Layer configuration pane will become available (in the right-hand pane).
- Fill in the Item Details on the General tab. For Layer Type choose Tile. Select an appropriate destination Folder for the image in your ArcGIS Online account. Choose who to Share with, in this case Everyone.
- On the Configuration tab set the Level of Detail (in this demo it is set to the full range of detail).
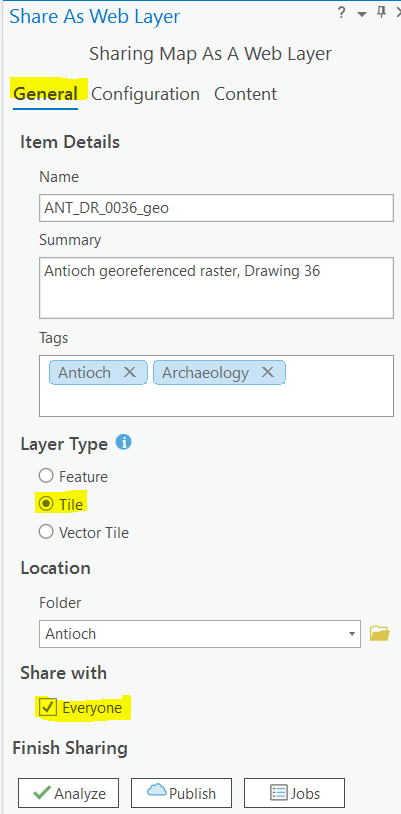
Share as Web Layer, General Settings
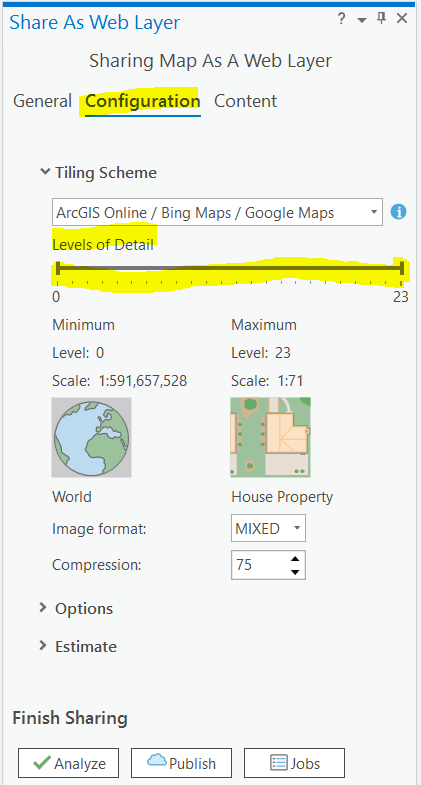
Share as Web Layer, Configuration
To Finish Sharing, click Analyze to check for errors. There may be errors, in particular, a warning that the layer is not in Web Mercator. This error can be ignored as the raster will automatically be re-projected as needed. Click Publish to post the tile layer to ArcGIS Online.
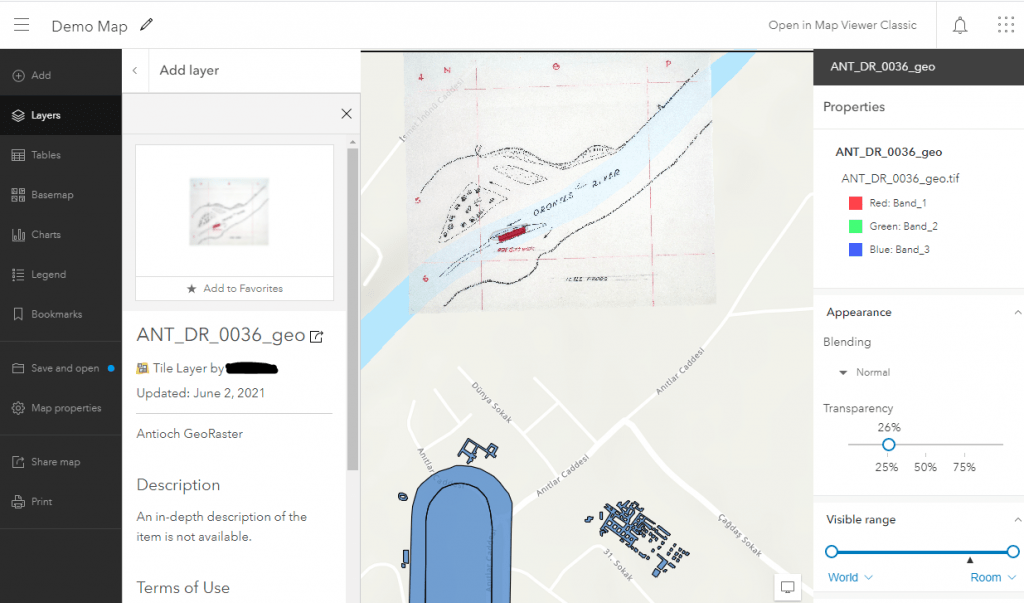
When the upload is complete, return to the Map Viewer, click the Add button to add a Layer and select “Search for Layer.” The uploaded raster will appear in the list. Add this layer to the map. Options to format the raster image are available. For example, the raster’s transparency can be set; this is a particularly helpful setting when working with multiple overlapping layers. Be sure to Save the Map as you make changes.
Format raster image in ArcGIS Online
Tip: additional formatting of map data and the configuring of popup windows can dramatically increase the visual aesthetic and usefulness of a map. Here is another view, this time using the Classic Map Viewer.
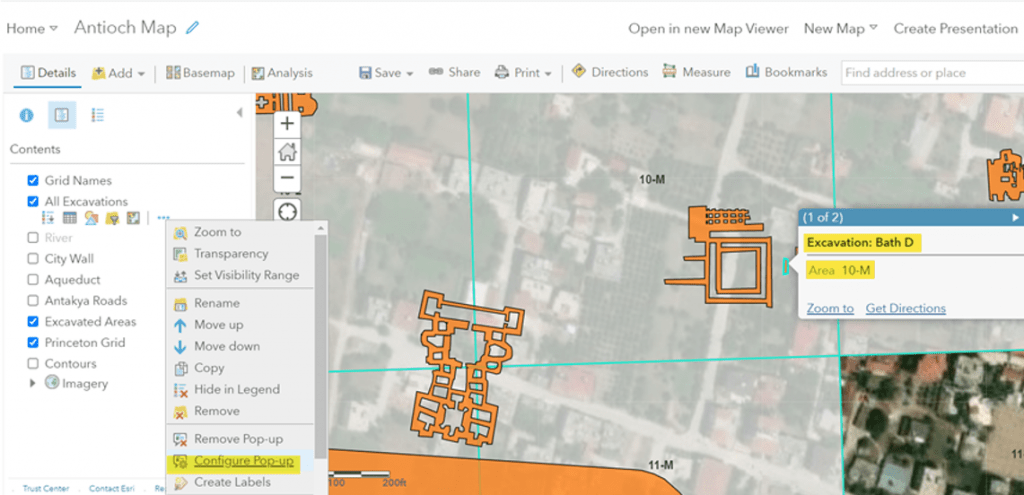
Experiment with styling options for your Map
iii) Sharing the Map
The Share menu option (on the left menu of the new Viewer, and along the top menu of the Classic Viewer) allows the level of privacy to be adjusted for the Map. Changing the allowed viewers to Everyone (public) will need to be selected in order to embed the map in a webpage.

Share a Web map with Everyone
You can also Share the Map from its listing in your account’s Content. In fact, it is good practice to return to the Item’s Content page to add Summary information, a detailed Description, Credits, Terms of Use, and other item details before the map is finally published.
Embedding a Map in a Webpage
Once a map is completed in Map Viewer it is ready to be embedded in a webpage. Note that if a map that has been embedded is later edited in ArcGIS Online (i.e., the layers are changed or toggled on or off) the updates will also affect the embedded version. Conversely the “Home” position and zoom level are included in the embedded code. These will not update for an embedded map.
If you are using the new Map Viewer:
From the Content page of your Map in your developer account, use the Create Web App option to create an Instant App; select the Minimalist option from the templates provided.
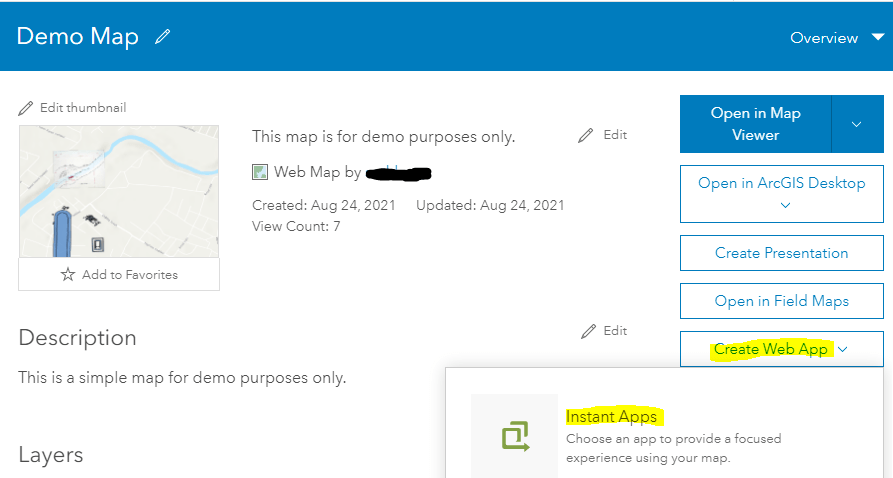
Create an App using your Map
From the App configuration pane, choose the Share option. Use the Express Setup options to customize your App. If you have not yet Shared the App, you will be prompted to do this. Share with Everyone, like you did for the Map.

Configure a Minimalist App
The Share pop-up lets you specify the map’s height and width. By default, the map will be responsive on devices of different screen sizes. This means that it will view appropriately on different devices, with the width of the device taken up by the embedded map while at the same time maintaining the ratio of height to width entered in the display settings.
Copy the Code block. This code will be used in the next step. Launch the App to preview it. Publish it.
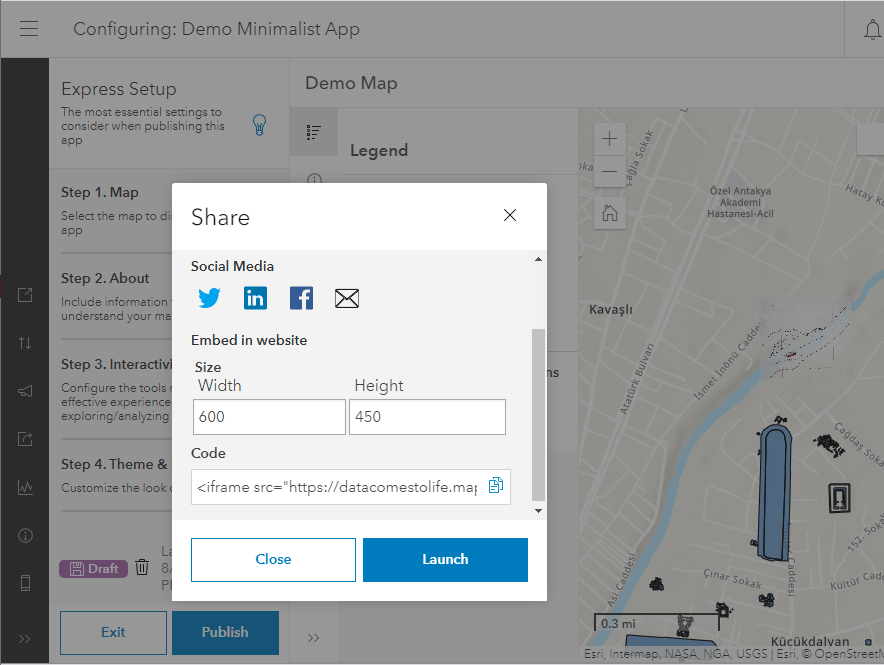
Sharing your Map using an embedded App
If you are using Map Viewer Classic:
Click the Share option on the top navigational pane and share with Everyone. A shareable URL for this Map can also be found on this screen.

Share and “Embed this map” in a website (Classic Map Viewer)
Click Embed in Website at the bottom of the window, then select the desired display Map options of the map to be embedded. Chosen features will be detailed within a block of code that contains style and iframe elements. The code can easily be pasted into an HTML file.

Options for embedding a Map in a website (Classic Map Viewer)
First, select the embedded map’s height, width and whether the sizing should be responsive (normally you would want this checked on). Then, in the Map Options section, add or remove display features using the check boxes.
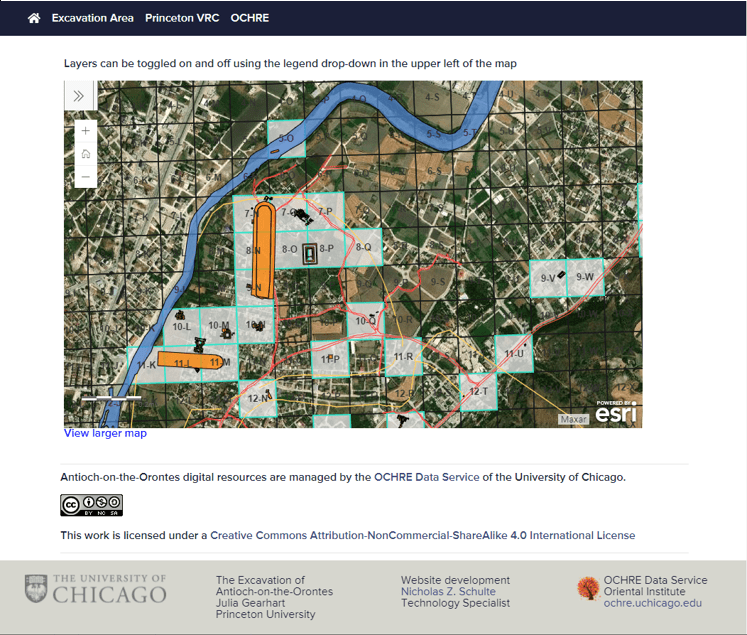
- View larger map will place a link underneath the embedded map which opens a new view the full size of the browser window.
- Disable scroll zoom removes mouseover zoom interaction using the scrollbar.
- Selecting Legend reveals the additional option of Layer Toggle. This option lets a user turn layers on and off in the embedded map.
Tip: I find that the most helpful display options to include are a combination of Zoom Control, Home Button, View larger map, Scale Bar, Legend, and Layer Toggle.
At the bottom of the window a theme variation can be chosen. Light is the default.
The Add Symbol tab allows images or symbols to be added to a specific location along with an entered title, description, and URL. This can also be accomplished using a map note when creating the map in Map Viewer.
Click Done when finished.
Configuring the HTML Code
If you are using the new Map Viewer:
When you are finished configuring the App options copy the Code block and paste it as an <iframe …> within an HTML file. A minimal HTML file might look like this:
<html>
<head>
<title>Sample Map</title>
</head>
<body>
<iframe src=https://datacomestolife.maps.arcgis.com/apps/instant/minimalist/index.html?appid=8108d7fe61e040fd89a64a10d9de8ffc width=”800″ height=”600″ frameborder=”0″ style=”border:0″ allowfullscreen>iFrames are not supported on this page.</iframe>
</body>
</html>
If you are using Map Viewer Classic:
When you are finished configuring the App options copy the Code block and paste it within the body of an HTML file. A minimal HTML file might look like this:
<html>
<head>
<title>Sample Map</title>
</head>
<body>
<style>.embed-container {position: relative; padding-bottom: 67%; height: 0; max-width: 100%;} .embed-container iframe, .embed-container object, .embed-container iframe{position: absolute; top: 0; left: 0; width: 100%; height: 100%;} small{position: absolute; z-index: 40; bottom: 0; margin-bottom: -15px;}</style>
<div class=”embed-container”><iframe width=”600″ height=”400″ frameborder=”0″ scrolling=”no” marginheight=”0″ marginwidth=”0″ title=”Demo Map” src=”//datacomestolife.maps.arcgis.com/apps/Embed/index.html?webmap=acdaeb28cce8480397727e723461c1a3&extent=36.1634,36.2238,36.188,36.2352&zoom=true&previewImage=false&scale=true&disable_scroll=true&theme=light”></iframe></div>
</body>
</html>
Tip: sometimes the View larger map link can display on top of other page content such as a footer. This can be resolved by defining the z-index property of each element.
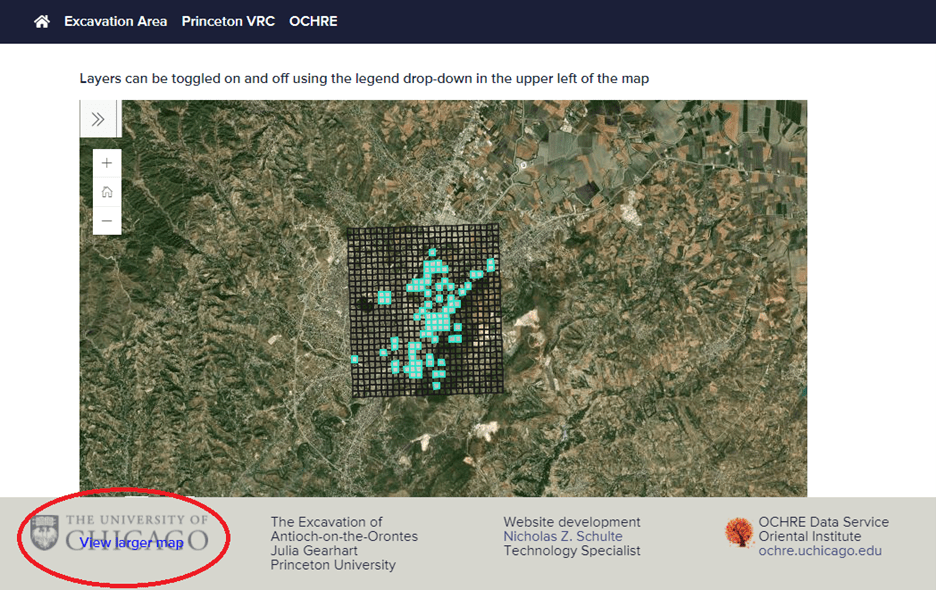
View of styled, interactive map embedded in website page