I have an unpopular opinion: I love compensation. Usually when I bring up compensation I’m met with a chorus of frustrated noises. But to me compensation is an opportunity to solve a complicated puzzle – and I really love a good puzzle.
In this post I’m going to walk you through my workflow for identifying flow cytometry compensation errors and determining the appropriate approach for fixing them. This workflow also works for spectral unmixing – just replace “compensation” with “unmixing” as you read the post! The key to getting good at this is really time and experience, and there is no way this post will be able to cover how to solve every possible error. However, I hope it will help you get started in identifying the most common causes and how to fix them.
Step 1: Determine if compensation errors exist.
I talked about this in the first post of my bad flow cytometry data blog series (find that here) but as a reminder you should always be on the lookout for compensation errors. The easiest way to identify those is to look for events below zero, especially populations that are significantly skewed into the negative region as opposed to being symmetrically centered around zero.
Step 2: Determine which tubes contain the compensation error.
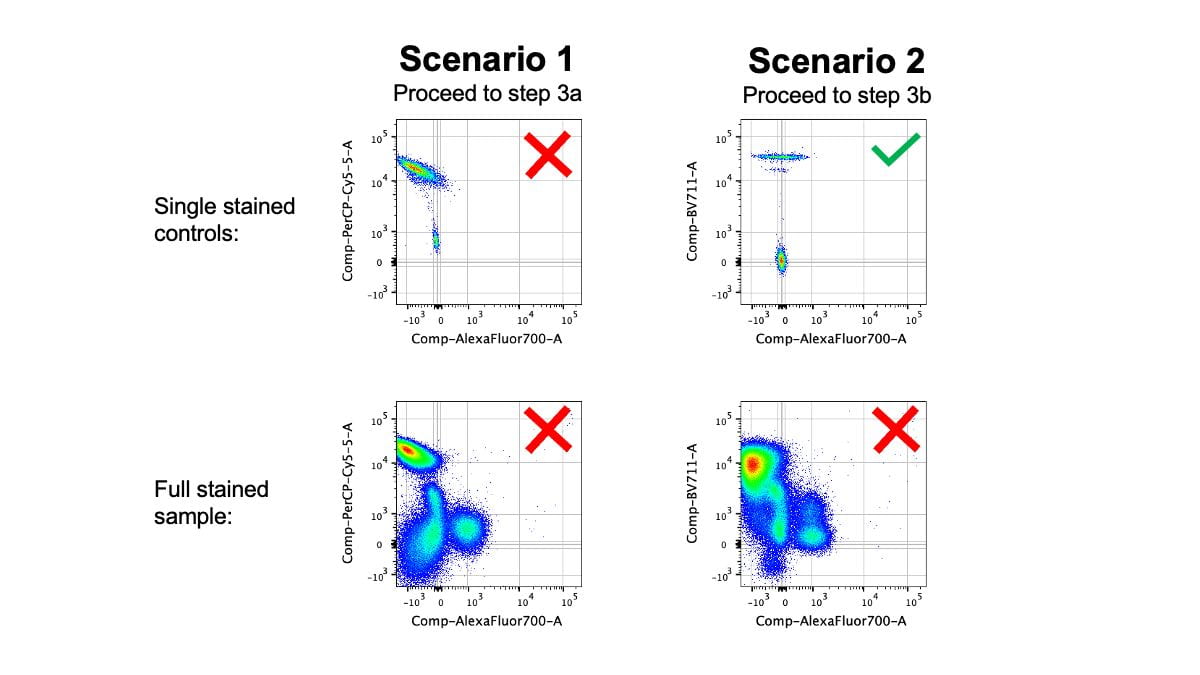
In order to determine the best approach for addressing the error(s), it’s important to get a full picture of which tubes contain the error. There are two scenarios:
- The exact same compensation error pattern exists in both the fully stained tube and single stained tube
- The compensation error only exists in the fully stained tube, but the single stained tubes are correctly compensated

Step 3a: Solutions for errors in both controls and full stains
The easiest explanation for this situation is that you just didn’t calculate compensation correctly, so you need to go back and fix it. It’s likely that you didn’t set up the gates in your automated compensation wizard correctly (see more on that here), or you tried to do manual compensation and made a mistake. A note about automated compensation wizards – sometimes they don’t match up the correct controls, so make sure the PE single stain control is assigned to PE, the APC single stain control is assigned to APC, etc. You should never assume that automated compensation wizards do everything correctly!
Another mistake in setting up automated compensation wizards happens when the autofluorescence of the positive particles is not appropriately matched to the autofluorescence of the negative particles. This is easy to overlook if the wizard uses a universal negative feature by default and there are multiple types of single stained controls (unstained cells and single stained compensation beads or different tissues for different controls). I don’t often see this mistake being the sole reason for major compensation errors, but it’s something to be aware of.
If you’re really struggling to get the single stain controls to look correctly compensated there are probably several issues contributing to the compensation errors. These could include contaminating a control with a second fluorophore, running the same control twice under different file names, poor panel design, poor instrument settings, and extremely high autofluorescence. The best way to proceed in this case is to find an expert to help you identify the exact mistakes that were made and run a new experiment avoiding those mistakes.
Step 3b: Solutions for errors in full stains but not controls
If you find that all of your single stain controls are perfectly compensated, but there are compensation errors in your full stain control, then your controls did not follow the rules. Specifically, I find that these two rules are the most common causes of this situation:
- The single stained control must be as bright or brighter than the fully stained sample.
- The exact same fluorophore must be used the stain the control and the fully stained sample.
Determining if you’ve failed to follow the first rule should be pretty easy – just use two plots or an overlay to compare the brightness of the fluorophore in the control and fully stained sample. The second rule can be broken by multiple scenarios. The most obvious rule violation is if a different fluorophore was used for the controls compared to the fully stained tubes. Common examples of this are using a FITC control to compensate GFP in the full stain or a BV510 control to compensate an aqua viability stain in the full stain. It’s also common to break the rule if you used compensation beads as your controls (see point 2 of this post). Another cause could be that you added fixative to your full stains but not controls – make sure you treat controls exactly the same as your full stains. It is possible for fixative to slightly alter a fluorophore emission spectrum, which could change the amount the fluorophore spills into a detector and require a different compensation value to account for the spillover.
Even if you did perfectly follow all of the rules for compensation controls there is one last factor to consider. If you used polymer dyes (BUV, BV, BB, SuperBright) in your panel, and did not use a polymer stain buffer (BD Brilliant Stain Buffer or ThermoFisher SuperBright Stain Buffer), then you might actually have fluorophores sticking together in your fully stained tubes instead of compensation errors.
Unfortunately the only way to fix all of these problems is to re-make your controls and/or samples. If you determined that the controls did not follow the rules, then new controls must be made that do follow the rules. You could calculate new compensation with the new controls and apply it to the old fully stained tubes, but please be aware that this situation is not ideal and there can be complications to running controls and samples on different days (see more about this in point 1 here). If you determined that the polymer dyes were sticking together then the only solution is to stain new samples and include the polymer stain buffer whenever you use more than one polymer dye in a panel (no need to include for single stain controls).
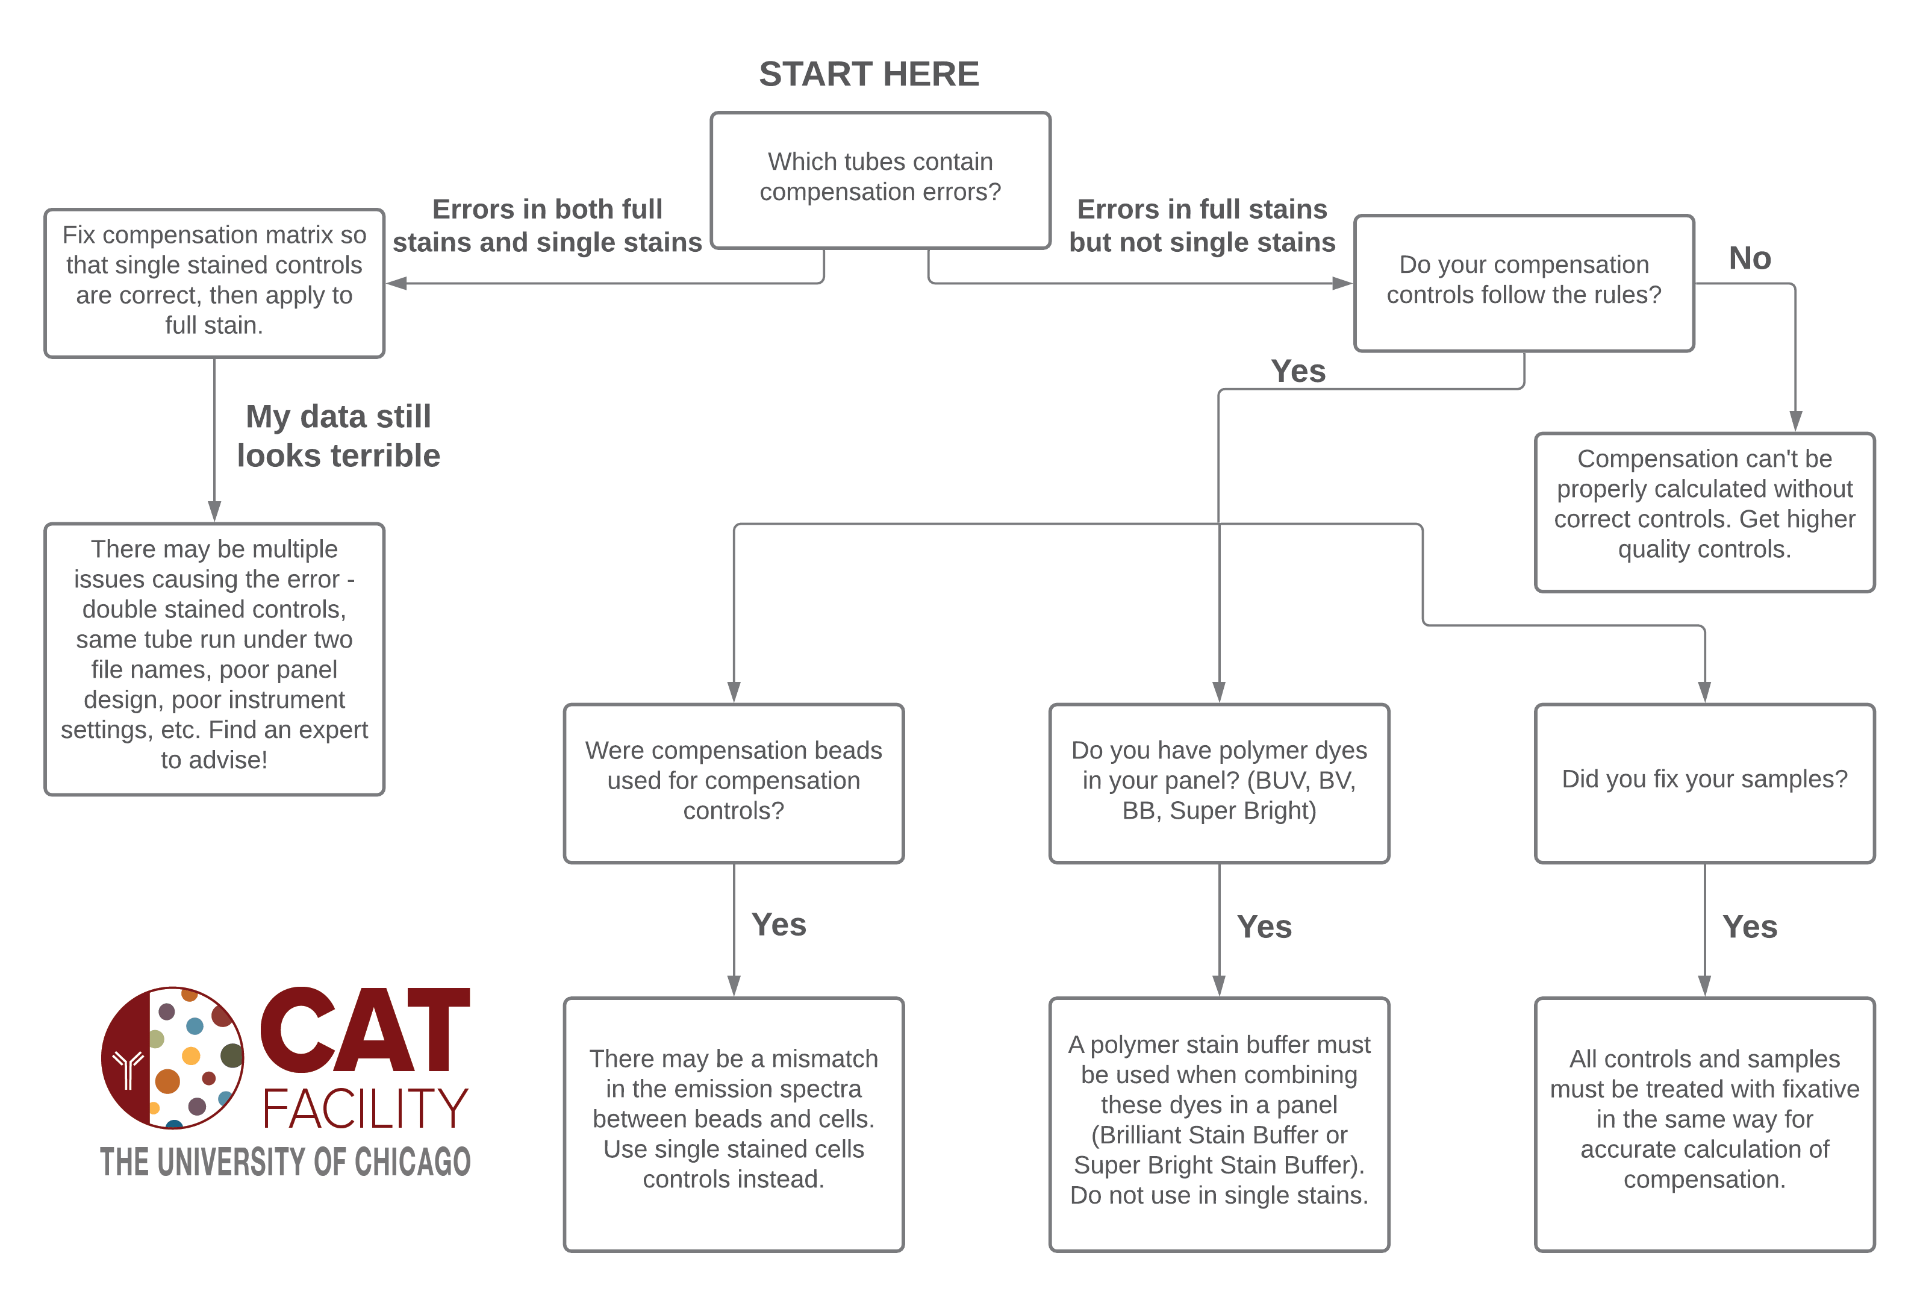
To summarize everything I’ll leave you with a decision chart:
If you’d like to discuss issues with a specific flow cytometry data set, you can reach me at LJohnston@bsd.uchicago.edu and we can discuss the consultation services.
Looking for more flow cytometry resources?
Compensation
Learn how to choose between compensating on the cytometer or in an analysis software, tips for troubleshooting compensation errors, etc.
Spectral Unmixing
Learn tips and tricks for performing spectral unmixing in SpectroFlo, how the spectral unmixing algorithm works, etc.


0 Comments